Road repairs
PH-PRO
- Access roads and parking spaces
- Average load up to 7.5T
- Highly permeable
- Joint width > 3mm
- Joint depth > 30mm
PH-FLEX

- Highly used public surfaces
-
Heavy and intense loads up to 40T
- Permeable
- Joint width > 5mm
- Joint depth > 30mm
PH-STRONG

-
Renovation, Public domain repair
-
Heavy and intense loads up to 40T
- Surface depth > 10mm
- Very resistant

PH-PRO
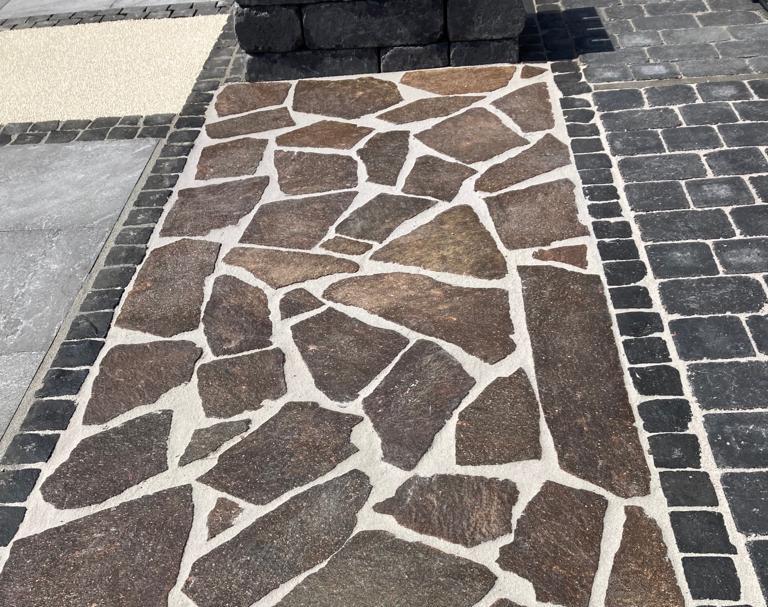
PH-PRO is a two-component paving and slab grouting mortar that is a real all-purpose sand. Thanks to its high fluidity, it can be used already from a joint width of 3 mm. Therefore, PH-PRO is ideally suited for grouting polygonal slabs and natural slabs, which are difficult to grout due to irregular edges and joints often running conically. This paver joint mortar can be used with confidence in entrances and driveways, as it supports loads of up to 7.5 t. It lends itself very well to renovating old cobblestone surfaces around the house.
- joint width from 3 mm
- joint depth from 30 mm
- optimal for polygonal plates
- very fluid
- self-compacting
- emulsifiable with water
- resistant to frost and road salt
- very permeable
- leaves no marks on the surface
Site requirements: The structure must be designed according to the expected traffic load. The regulations and technical data sheets for the realization of paved surfaces must be respected. Future loads must not cause subsidence of the surface as well as the separation and movement of the pavers. Ideally, it is advisable to use the trass-based laying mortar accompanied by its guarantee system. For optimal processing, we recommend the use of processing tools.
Prepare: Clean the joints to a minimum depth of 30 mm (under traffic load at 2⁄3 of the height of the pavers or slabs, joint width minimum 3 mm). For slab thicknesses less than 30 mm, the installation must be done in bonded construction and the entire joint must be completely filled with PH-PRO. In principle, the surface to be grouted must be freed of all kinds of dirt before grouting. Adjacent surfaces that will not be grouted must be covered with adhesive tape.
Pre-wet: Pre-wet the surface. Absorbent surfaces as well as higher floor temperatures require more intensive pre-wetting.
Bag mixing: Pour the 25 kg bag of sand into the concrete mixer and start the mixing process. During the mixing process, slowly and completely add the resin/hardener components (2.5 kg), supplied separately. To fully utilize the contents of the containers, they must be rinsed with water. To do this, you must fill these 2 cans of resin/hardener, emptied beforehand, with 0.5 l each, then close, shake well and then add the contents to the mixture. After 3 mins. mixing time, add 3 l of water and mix again for at least 3 min. Use a professional mixer or concrete mixer.
Mixing Bucket: Open the bucket, open the 2 canisters inside and slowly add the entire contents to the filling component. To fully utilize the contents of the containers, they must be rinsed with water. To do this, fill the two cans of resin/hardener, previously emptied, with 1 liter each, then close, shake well and then add the contents to the mixture. Start mixing. No more water addition is necessary! Total mixing time: 6 minutes minimum. Use a professional mixer or concrete mixer.
Treat: Pour the ready-to-use joint mortar onto the previously moistened surface, then carefully work the mixture into the joints using a rubber squeegee. In order to make the most of the fluidity of the mortar, it will be poured into three or four different places on the grouting area. If the ready-to-use mortar is not used immediately and completely, the remaining quantity must be mixed again during the specified processing time, in order to obtain the optimum fluidity again. All tools as well as work shoes should be cleaned regularly with a jet of water, in order to avoid soiling by binders and footprints on the surface of the stones.
Final cleaning: After approx. 10–15 minutes, first sweep the surface thoroughly with a stiff bristle broom and then sweep again with a soft bristle broom, until no mortar residue remains on the surface. Bevels in brick and slab coverings must be cleared, as sufficient adhesion of the mortar is not ensured. The right time for cleaning has come when the broom no longer causes whitish streaks on the surface. Diagonal sweep of the regular laying direction. The swept up residues must no longer be used.
Post-treatment: The freshly treated surface should be protected against rain for 12–24 hours. In this case the rain cover should not be placed directly on the surface so that air can circulate.

PH-FLEX
The PH-FLEX special grouting mortar has optimal functional properties. The mortar also follows the movements of the coating that occur in the case of unbonded execution. The high adhesion of the sidewalls makes it possible to practically avoid any tearing of the sidewalls. Functionality is not affected by isolated hairline cracks. The filling with the flexible joint should be about 3 cm. The minimum joint width is set at 5 mm. Joint irons should be used to obtain an even joint. The bedding and grouting material should ideally consist of a 0/8 mm mineral mixture of crushed sand and gravel (hard stone). It must be certified and conform to the standards.
If the bed and the grouting material have different particle size curves, the stability of the filter must be ensured. Different grain size curves must be explained and confirmed separately by the contractor.
Hue is determined by sampling. The use of PH-FLEX results in a momentary intensification of the color of the stone surface. However, the synthetic resin film and the resulting deepening of the color disappear after a few months due to weathering and natural loading.

- No weed growth
- No rinsing
- No washing
- No weed growth
- Permeable
- Resistant to frost and road salt
- Resistant to vacuum sweepers
Site requirements: The structure must be designed according to the expected traffic load. The regulations and technical data sheets for the realization of paved surfaces must be respected. Future loads must not cause subsidence of the surface as well as the separation and displacement of the pavers. The bedding and grouting material should ideally consist of a 0/8 mm mineral mixture of crushed sand and gravel (hard rock). It must be certified and conform to the standards. If the setting bed and the grouting material have different grain size curves, the stability of the filter must be ensured. Deviating grain size curves must be explained and confirmed separately by the contractor.
Prepare: Clean joints to a minimum depth of 30mm (under traffic load at 1⁄3 stone height, minimum joint width 5mm). In principle, the surface to be grouted must be freed of all kinds of dirt before grouting. Adjacent surfaces that will not be grouted must be covered with adhesive tape.
Pre-wet: Pre-wet the surface. Absorbent surfaces as well as higher substrate temperatures require more intensive pre-wetting.
Mixing: Open the bucket, open the bottles inside and pour the contents slowly and completely into the filling component. To fully utilize the contents of the containers, they must be rinsed with water. To do this, fill the two resin/hardener containers, empty beforehand, with 100 ml each, then close, shake well and then add the contents to the mixture. Start the mixing process. No more water addition needed! Total mixing time: 6 minutes minimum. Use a professional mixer or concrete mixer.
Treatment: Pour the ready-to-use paver joint mortar onto the well-wet surface and work the mortar carefully into the joints using a rubber squeegee. To take full advantage of the fluidity of the mortar for paving joints, the mortar will be poured at three or four different places on the jointing area. If the ready-to-use mortar is not used immediately and completely, the remaining quantity must be mixed again during the specified processing time, in order to obtain the optimum fluidity again. All tools as well as work shoes should be cleaned regularly with a jet of water, in order to avoid soiling by binders and footprints on the surface of the stones.
Final cleaning: After approx. 10–15 minutes (floor temperature +20°C) Sweep the stone surface first very carefully with a rough broom and then finally with a fine broom, until the surface is free from all residues of mortar. The bevels of brick and slab coverings must be cleared, since sufficient adhesion of the mortar is not ensured. The right time for sweeping is when the broom no longer causes whitish drips on the stone surface. Sweep diagonally to the seam line. The sweeping material should no longer be used.
After treatment: In case of drizzly rain protection is not necessary. In the event of heavy and continuous rain, the freshly grouted surface must be protected from rain for 12–24 hours. In this case, the tarpaulin should not be placed directly on the surface, so that air can circulate.

PH-STRONG
PH-STRONG is a 2-component epoxy resin repair mortar. This mortar is used for sealing cracks by adhesion and repairing edges or tearing areas. Thanks to its high reactivity, the surface can be reopened to traffic very quickly. Whether it's road damage, holes, bursting edges or for sagging road trapillons, or overly stressed floor coverings PH-STRONG mortar can be used all year round, even at low temperatures from 5° C. It can also be used for maintenance work.
- surface depths from 10 mm
- very resistant
- for adhesive crack sealing
- to repair ridges/breaks
- for the treatment of cavities and defects
- usable from 5 °C
Site requirements: The structure must be designed according to the expected traffic load. Future loads must not cause subsidence of the surface as well as the separation and movement of the pavers.
Prepare: Clean the surface to a minimum depth of 10mm. The surface must be load-bearing, of good adhesion, free of cement mixture, dust and friable parts, moreover free of oil, grease and other dirt likely to act as an anti-adhesive.
If necessary: Pre-treat the substrate by sandblasting or shot-blasting, milling or sanding. The minimum bending-tensile strength of the support must be 1.5 N/mm² (Herion equipment).
Mixing: Open the bucket, open the parts in it, and add the contents completely to the filling component. In order to be able to fully utilize the contents of the boupartiels, the resin/hardener component should be brought to room temperature, especially when working in winter. This makes emptying and mixing easier. Start mixing. No more water addition! After 3 minutes of mixing time, repot the mortar in a clean, dry bucket and mix again for at least 3 minutes. When repotting, make sure any remaining resin on the inside rim of the bucket is scraped off and added to the new bucket. Total mixing time: At least 6 minutes. Use a professional mixer or forced-mix mixer.
Dealing with defects/holes: Pour the ready-to-use repair mortar onto the surface and pre-distribute with a shovel or a metal squeegee. Compact the mixed material with a trowel and smooth the surface. Good compaction is of utmost importance for a durable end product!
Dealing with chipped edges/kerbside repairs: Apply the ready-to-use repair mortar to the area to be repaired with a trowel and shape roughly, then compact and smooth with a smoothing trowel. Tip: Use the 2nd smoothing trowel as a „formwork“ to model a well-compacted edge. Form the largest vertical surfaces.
Pro Tip: For best strength at edges, spalls and low ground areas, pre-mix resin/hardener components in a separate bucket for 2 minutes, then add completely the content in the fill component. Mix again for at least 3 minutes. Since a residue of the resin/hardener mixture always remains in the bucket, this remaining amount can be used as a primer for defects. To do this, spread the resin/hardener mixture using a brush. The repair mortar is then cured wet-on-wet as described above.
All tools and work shoes must be cleaned with commercially available solvents (e.g. ethanol, methylated spirit) if work is interrupted and after treatment. Cured product can only be removed mechanically.
After treatment: In case of drizzling rain a rain cover is not necessary. In the event of heavy and continuous rain, the freshly grouted surface must be protected for 2 hours. The tarpaulin should not be placed directly on the surface, so that air can circulate. In case of doubt, it is advisable to carry out a preliminary test on a sample area before treatment.
